First steps
Let’s get started!
A quick introduction
Before we start actually coding, here’s a quick introduction to the tools you’ll be using.
What is PCIbex?
PCIbex (“PennController for Ibex”) is an extension library for Ibex (“Internet Based EXperiments”), a JavaScript-based platform for online experiments.
A PCIbex experiment has two parts:
- An experiment script written in PCIbex syntax
- A server that hosts the experiment
We take care of the server, which means that you can focus on writing your experiment script!
By the way, we generally use “PennController” and “PCIbex” interchangeably; feel free to use whichever term you prefer.
What is the PCIbex Farm?
The PCIbex Farm is a server that provides free hosting for PennController experiments.
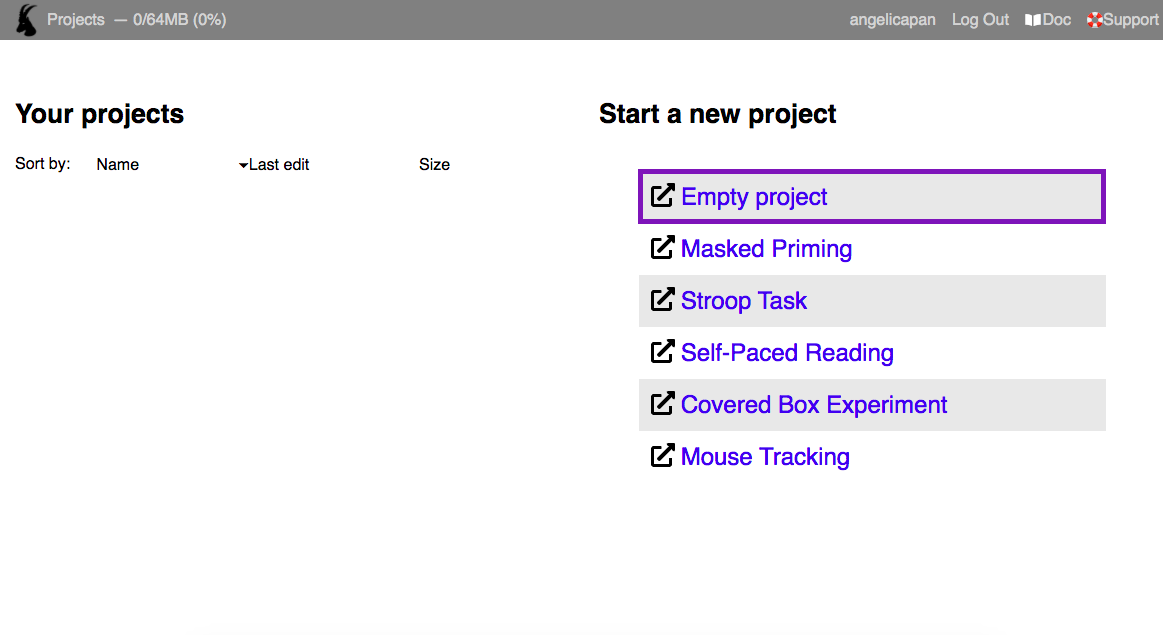
If you haven’t created an account yet, go to the PCIbex Farm, click Sign up, and follow the instructions to create an account.
When you create a new experiment (in purple), its project page automatically contains an experiment script called main.js (in yellow), as well as all of the files necessary to run PennController (in green). The code editor panel (in blue) is where you actually write your experiment script.
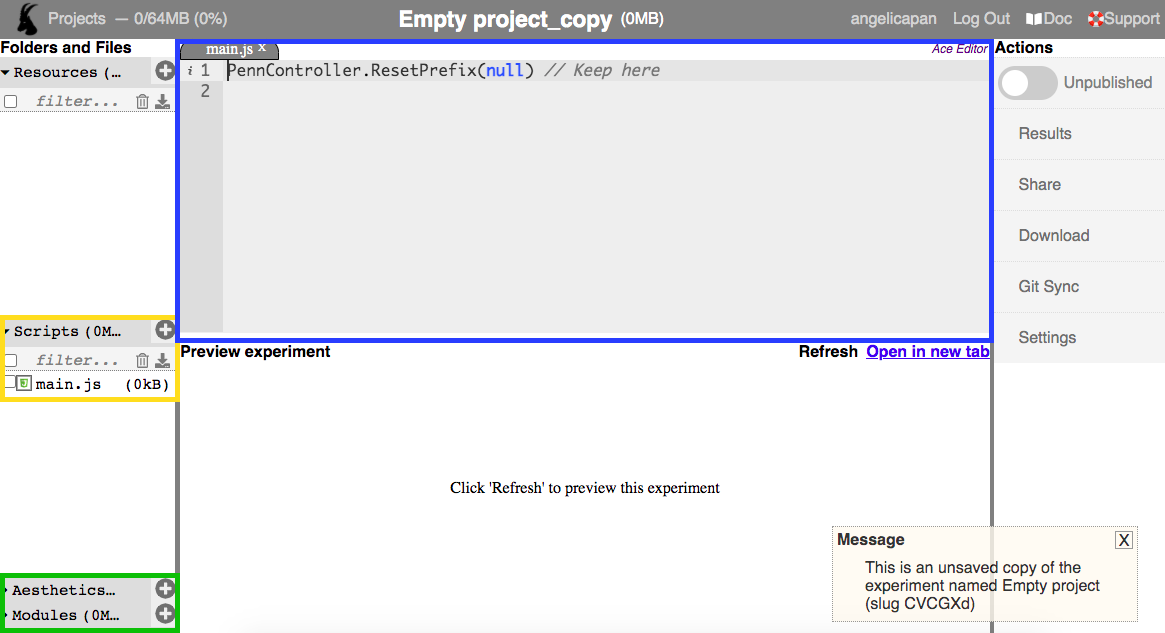
Don’t forget to save! To save a new experiment, modify its title and hit Enter, or type something in the code editor panel, which autosaves your work.
Setting up the BasicTutorial experiment
- Open the BasicTutorial starter experiment in a new tab. You’ll see a message that says “This is an unsaved copy of the experiment named BasicTutorialEmpty (slug aplwij)”, because this experiment is a copy of the master BasicTutorial experiment.
- Save this copy to your own experiment by renaming it to something like “BasicTutorial” and hitting Enter.
Your project page should look something like this:
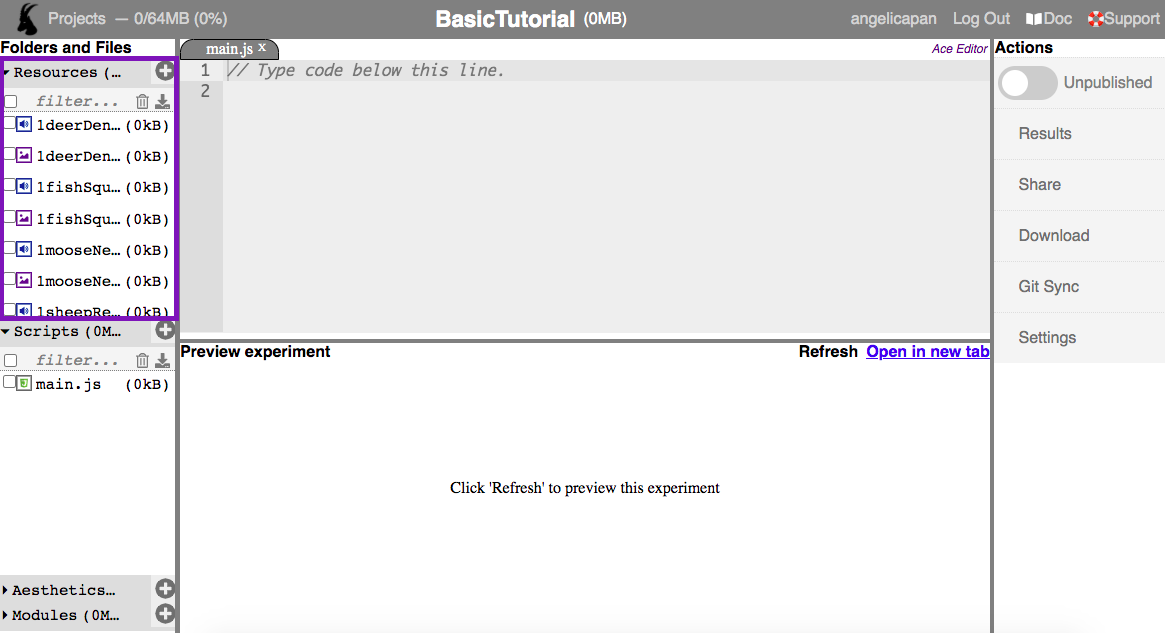
What are all of the files in the Resources section (in purple), and why does it say that they’re 0kB?
We’ll use these files in the Basic Tutorial and Advanced Tutorial. We’ve included them in the starter experiment so that you don’t have to upload them yourself! The files are listed as 0kB because they’re “shared” from the master BasicTutorial experiment.
Each PCIbex Farm account has a 64MB storage quota, meaning that the total size of all files across all experiments cannot exceed 64MB. By sharing the resource files from the master experiment, you can access these files without using any of your own storage.
A note on debugging
PennController comes with a few tools to help detect basic typos, syntax errors, and other issues.
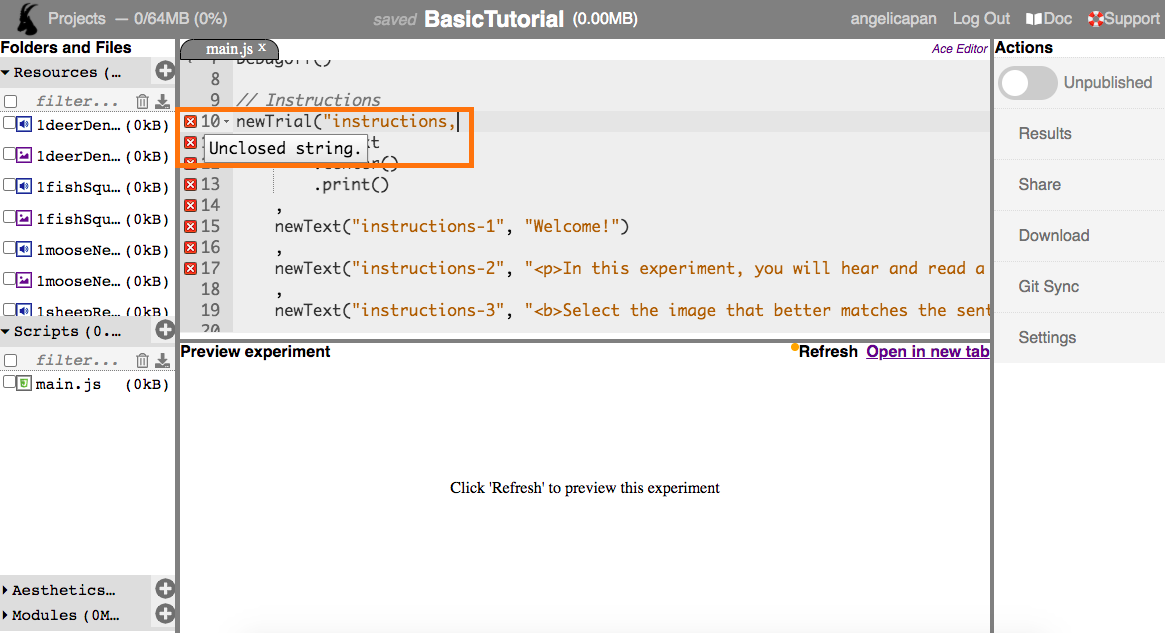
Within the code editor, the syntax checker (in orange) throws a warning if it detects an error. In this example, line 10 is missing a closing quotation mark:
However, the syntax checker is still very basic and may miss some errors.
When you run or preview an experiment, the debugger (in orange) is a small, expandable panel in the upper-right corner:
The debugger has five tabs:
- Info: Displays information about the current trial.
- Sequence: Lists all trials, and allows you to skip to any particular trial.
- Tables: Lists all tables.
- Errors: Presents any error messages.
- Log: Reports whenever a command is executed on an element, or whenever a resource is successfully preloaded.
These tabs might not make sense until you learn more about PennController experiments, but the important part to know is that you should use the debugger as you build and test an experiment. You’ll inevitably face problems, and the debugger will make it easier to solve them.
We recommend reading the Debugger documentation after you’ve completed this tutorial and the Advanced Tutorial, and are more familiar with PennController experiments.
Creating a new trial
Let’s start coding! All code should be written in the code editor panel.
We’ll first create a new trial. You can think of PennController trials as building blocks that you combine to create an experiment. Trials are composed of even smaller building blocks: elements (things that have content) and commands (things that make elements do things). We’ll talk more about elements and commands in upcoming sections.
Trials are created by calling the PennController.newTrial(TRIAL_LABEL) command, where TRIAL_LABEL is the label of the trial.
The TRIAL_LABEL parameter is technically optional, but we recommend giving every trial a label.
Create a new trial called "experimental-trial".
@// Type code below this line.
@
+// Experimental trial
+PennController.newTrial("experimental-trial")
This new trial has a label, but nothing else. We’ll soon add elements and commands so that the trial can actually do something.
A trial ends when there’s nothing left for it to “do”, and an experiment ends when all of its trials are done.
In this case, if you run this very empty experiment by clicking Refresh or Open in new tab, it’ll end almost immediately, and you’ll see a message that says “The results were successfully sent to the server. Thanks!”.
Removing the PennController. prefix
All PennController commands begin with the prefix PennController., in order to avoid naming conflicts with other JavaScript modules. This can be tedious to type many times, so we recommend calling PennController.ResetPrefix(null) at the start of every experiment.
The PennController.ResetPrefix(null) command removes the PennController. prefix for all subsequent commands. You can also pass a string instead of null, which resets the PennController. prefix to the passed string.
Remove the PennController. prefix.
@// Type code below this line.
@
+// Remove command prefix
+PennController.ResetPrefix(null)
@
@// Experimental trial
!newTrial("experimental-trial")
From this point on, this tutorial assumes that the PennController. prefix has been removed. For example, in prose we’ll say “the newTrial command” instead of “the PennController.newTrial command”.