Sending recordings to an S3 bucket
Make sure to replace all occurrences of https://farm.pcibex.net with your server’s origin in the code snippets below (eg. the bucket’s CORS policy, the code of the lambda function, etc.) if you are not running your experiment from the PCIbex Farm.
To send a recording to an S3 bucket using AWS and PCIbex, follow the steps below in this exact order:
1. Create an S3 Bucket in the AWS Management Console
Enter the name of your bucket as follows (in our example the name of the bucket is 4examplebucket123—you need to remember the name of your bucket for later):
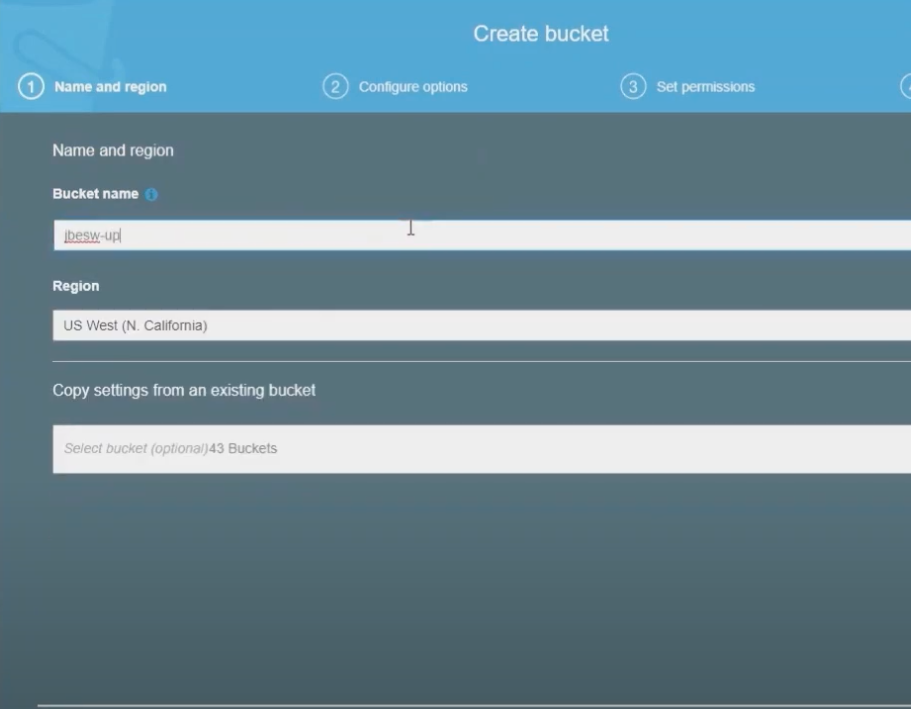
Remember to click Block all public access.
2. Click on your bucket and go to the Permissions tab, scroll down to see CORS Configuration
In the body of CORS configuration (code editor) enter the following:
Make sure that AllowedOrigins matches your origin
[
  {
    "AllowedHeaders": [
        "*"
    ],
    "AllowedMethods": [
        "POST"
    ],
    "AllowedOrigins": [
        "https://farm.pcibex.net"
    ],
    "ExposeHeaders": [],
    "MaxAgeSeconds": 3000
  }
]
Click Save.
3. Create a Lambda function
After you click create Lambda function, you should see a screen like this:
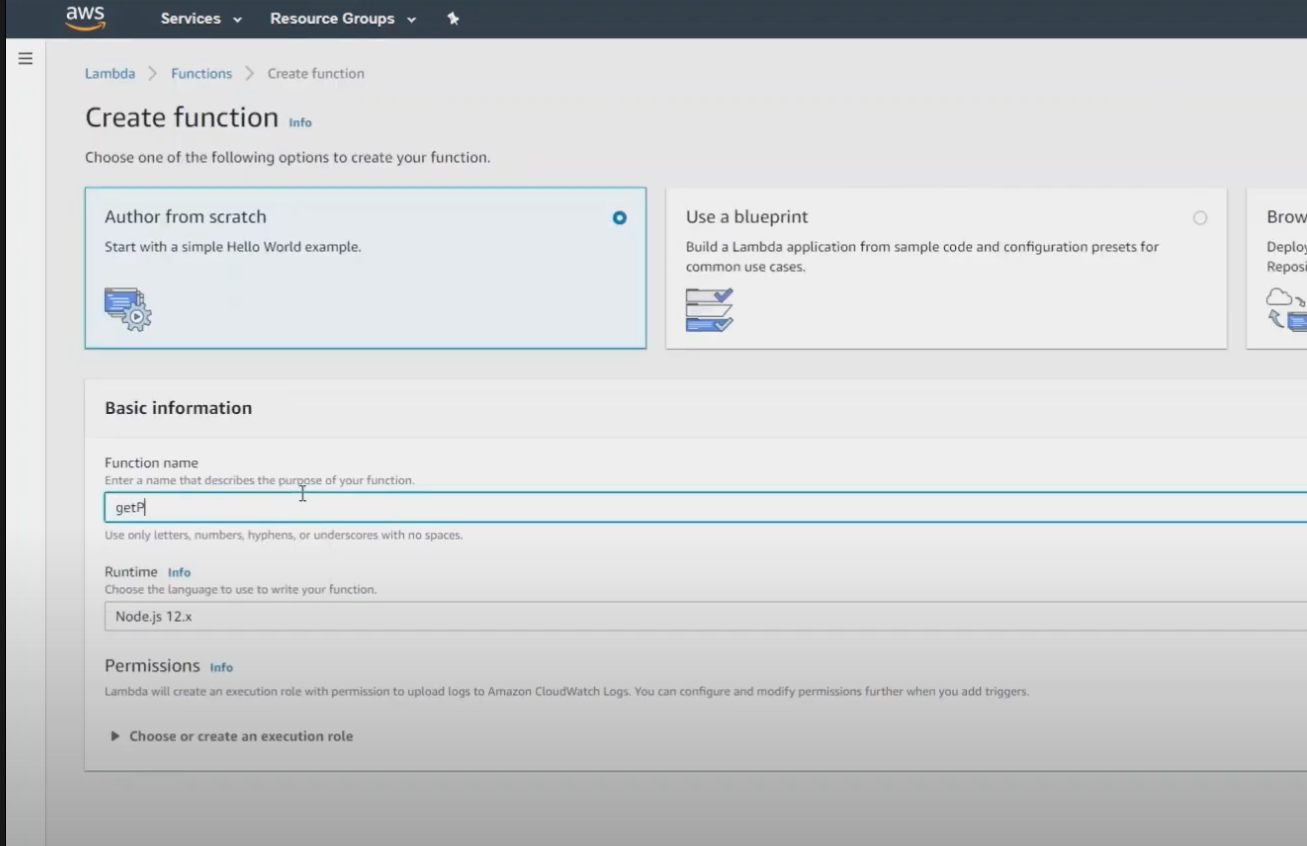
Now, scroll down to see code editor where you will enter this code:
Make sure to replace 4examplebucket123 with your bucket’s name, and that Access-Control-Allow-Origin matches the origin of the server running your experiment
    /*global crypto*/
const crypto = require("crypto");
const CreateUUID = () =>
  ([1e7] + -1e3 + -4e3 + -8e3 + -1e11).replace(/[018]/g, c =>
    (c ^ (crypto.randomBytes(1)[0] & (15 >> (c / 4)))).toString(16)
  );
const S3 = require("aws-sdk/clients/s3");

/**
* Use AWS SDK to create pre-signed POST data.
* We also put a file size limit (100B - 10MB).
* @param key
* @param contentType
* @returns {Promise<object>}
*/
const createPresignedPost = ({ key, contentType }) => {
  const s3 = new S3();
  console.log("key",key,"contentType",contentType);
  const params = {
    Expires: 60,
    Bucket: "4examplebucket123",
    Fields: {
      "Content-Type": contentType,
      key
    }
  };
  return new Promise(async (resolve, reject) => {
    s3.createPresignedPost(params, (err, data) => {
      if (err) {
        reject(err);
        return;
      }
      resolve(data);
    });
  });
};
/**
* We need to respond with adequate CORS headers.
*/
const headers = {
  "Access-Control-Allow-Origin": "https://farm.pcibex.net",
  "Access-Control-Allow-Credentials": true,
  "Access-Control-Allow-Methods": "OPTIONS,GET",
  "Access-Control-Allow-Headers": "content-type"
};
module.exports.getPresignedPost = async (event,context) => {
  try {
    const { filename , mimetype } = event.queryStringParameters;
    const presignedPostData = await createPresignedPost({
      key: `${CreateUUID()}_${filename}`,
      contentType: mimetype
    });
    const r = presignedPostData.fields;
    r.url = presignedPostData.url;
    return {
      statusCode: 200,
      headers,
      body: JSON.stringify(r)
    };
  } catch (e) {
    return {
      statusCode: 500,
      headers,
      body: JSON.stringify({
        error: true,
        data: null,
        message: e.message
      })
    };
  }
};
4. Edit the policies attached to your Lambda function
Click on the configuration tab again. From the left toolbar click on Permissions tab. You will see clickable role name as follows:
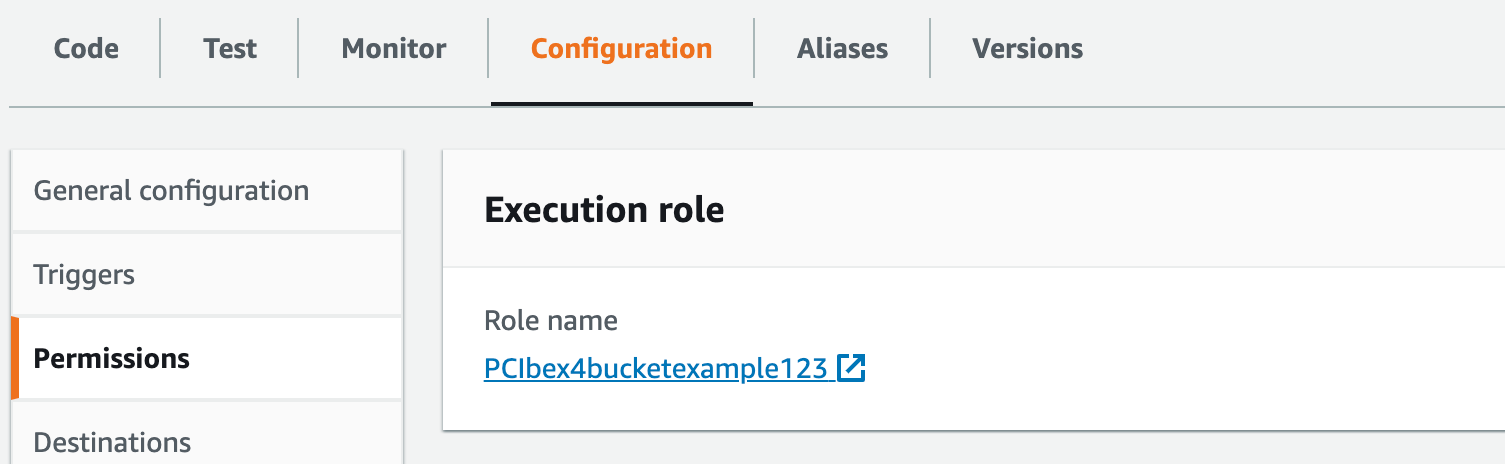
Click on it.
Now click Attach Policies in the new tab that is opened. Then click Create Policy. Click on JSON and enter the following code:
Make sure to replace 4examplebucket123 with your bucket’s name
{
"Version": "2012-10-17",
"Statement": [
    {
        "Sid": "VisualEditor0",
        "Effect": "Allow",
        "Action": [
            "s3:PutObject",
            "s3:GetObject",
            "s3:PutObjectAcl"
        ],
        "Resource": "arn:aws:s3:::4examplebucket123/*"
    }
  ]
}
Click Next until your policy is saved.
Now, again go back to your Lambda function. Click the Configuration tab again. From the left toolbar click on Permissions. You will see a clickable role name. Click on it. Click Attach Policies in the new tab. Now search for the policy that you have just created and attach it.
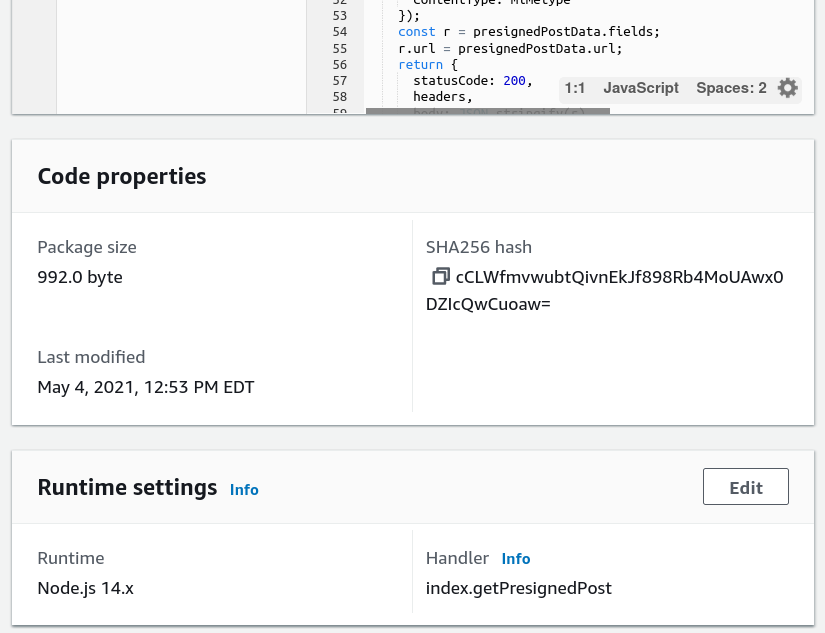
5. Change the handler
The handler should be set to index.getPresignedPost under the Runtime settings.
6. Deploy the Lambda function
Go back to your Lambda function. Click the Deploy button above the code editor to deploy your Lambda function.
7. Add an API trigger
Click Add API trigger above the code editor of your function. Create an HTTP API. Click Add.
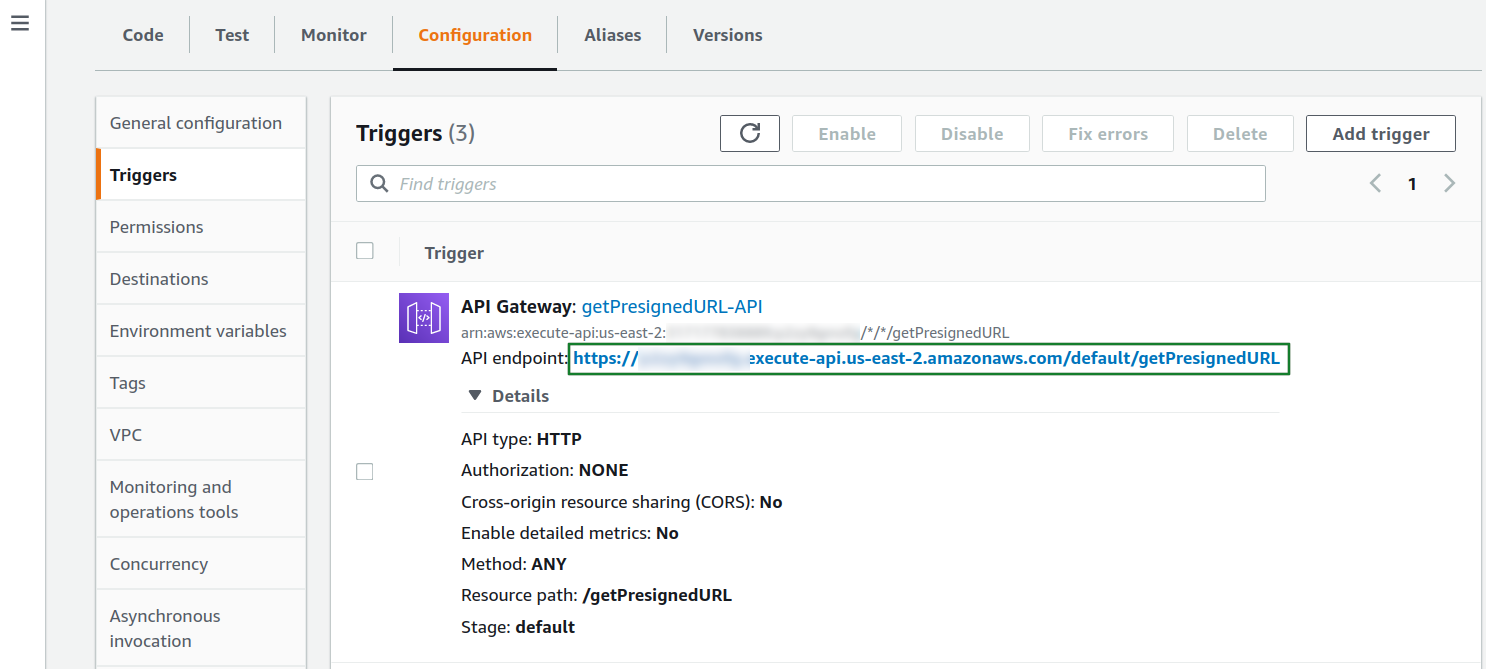
8. Test your function in PCIbex
First of all, click on your Lambda function, then on API gateways, and then click on the details of your API. Copy the endpoint URL (in our case, as visible on the screenshot below, the URL is https://v3admu6ep6.execute-api.us-east-2.amazonaws.com/default/getPresignedURL)
Copy the MediaRecorder template at PCIbex, and change the URL in InitiateRecorder with the one from your own API gateway
Take a full test-run of your project and then visit your S3 bucket: if everything was properly set up, you should see now zip archives in your bucket
You are all done!